The objective of this walkthrough will be to take the original image, zoom to a section of the image, then save the zoomed view as a bookmark of the original image.
Procedure
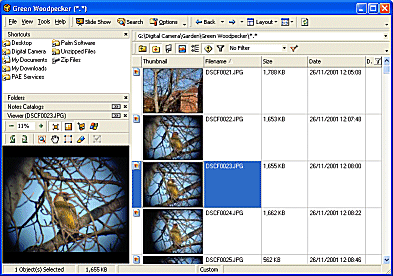
1. Select the image in the File List Pane
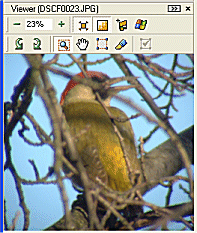
2. In the Viewer Pane click the Selection and Zoom icon ![]()
3. Select the portion of the image that to be zoomed as follows
 |
 |
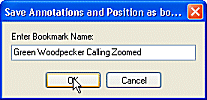
4.Select the Save as Bookmark ![]() icon.
icon.

5. Enter the title for the Bookmark in the Enter Bookmark Name field and click OK
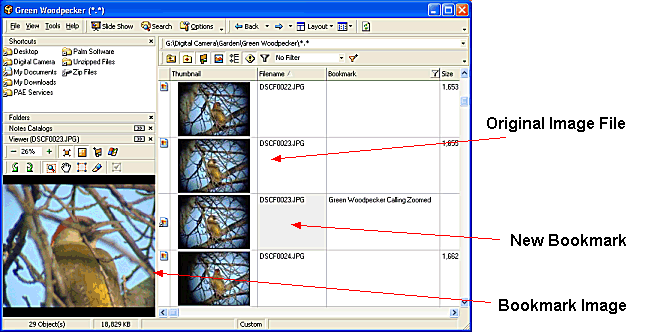
6. The bookmark will now be added to this file and will appear in the File List Pane if the Bookmarks column is enabled in the file list view (see customizing columns)
![]() Note
Note
| Related Topics |
Creating a Bookmark
Creating Notes
Viewer Pane
Document Viewer Toolbar
Image Editing Toolbar