Images can be directly printed from FNO3
1. Select the file to be printed in the File List Pane
2. On the Main Toolbar click File, Click Print File or Image to display the Print dialog.
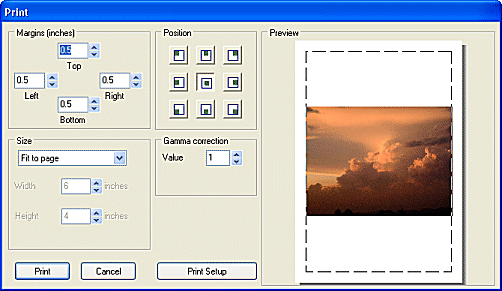
3. A preview of the image is displayed along with options for adjusting how the image will be printed
| Option | Description |
| Margins | Measurements are in inches in increments of .01 inch |
| Position | Select the desired position of the image from the nine available positions |
| Size | Options available are:
Normal (native) |
| Gamma correction | Provides adjustment to brightness and contrast of an image. Default value of "1" is normal. Increasing the value will increase the brightness and contrast. Decreasing the value will reduce the brightness and contrast |
4. The Print Setup button displays the Print Setup dialog shown below.
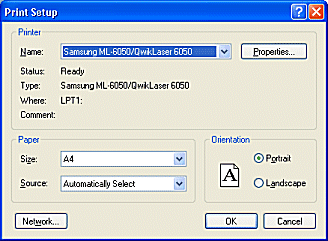
| Option | Description |
| Name drop down menu | Change printer to be used from printers installed on the PC |
| Properties | Adjust printing properties of selected printer |
| Paper - Size | Change paper size |
| Paper - Source | Select tray source of printer (if available) |
| Orientation | Print file in Portrait Mode or Landscape Mode |
| Network | Choose an alternative Printer from the Network |
5. Confirm the print settings to be used and click OK to return to the print dialog
6. Select Print to print the image